Screen capture from Metaio Creator. Untextured 3D geometry placed within the point cloud of a mapped environment. Once published to a junaio channel, the 3D geometry will be placed over the environment when browsed in the junaio AR browser.
Screen captures from the completed image-tracking augmented contextual instruction user experience. The augmented contextual instruction is made up of a sequence of junaio channels that can be browsed in the junaio AR browser. For this example, the channels were browsed using junaio on an iPad.
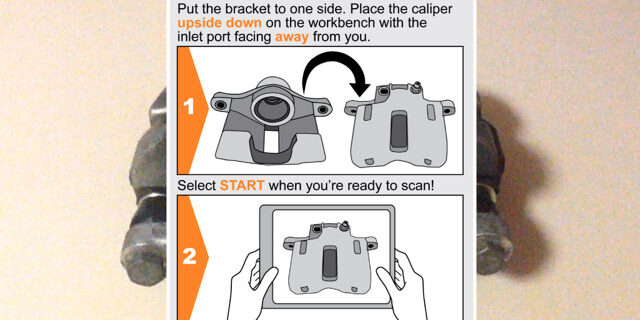
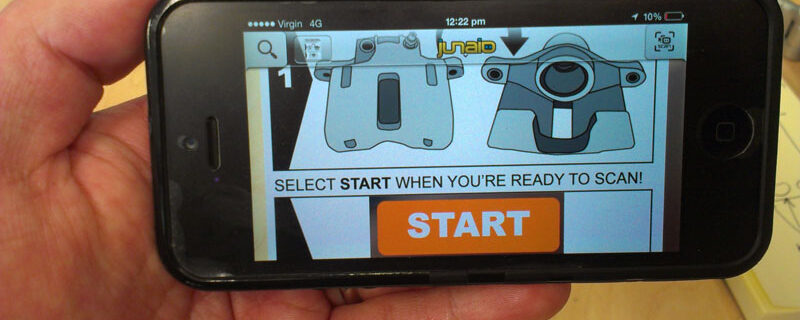
The first step in disassembling a rear brake caliper is to remove the bracket from the caliper. Use a spanner to loosen the retaining bolts.The second step in disassembling a rear brake caliper is to inspect and clean the retaining bolts and remove the rubber seal from the bracket.Insert the air tool into the fluid inlet port of the caliper.Use a pointed tool to remove the piston seal from the caliper.The instructional poster provides the user with an entry point to the object-based or image-based ‘How to disassemble a rear brake caliper’ augmented contextual instruction.
Screen captures from the completed object-tracking augmented contextual instruction user experience. The augmented contextual instruction is made up of a sequence of junaio channels that can be browsed in the junaio AR browser. For this example, the channels were browsed using junaio on an iPad.
Place the assembled rear brake caliper on the workbench with the retaining bolts facing towards you.The first step in disassembling a rear brake caliper is to remove the bracket from the caliper. Use a spanner to loosen the retaining bolts.Remove the bracket from the caliper and then place the bracket on the workbench facing towards you.The second step in disassembling a rear brake caliper is to inspect and clean the retaining bolts and remove the rubber seal from the bracket.Put the bracket to one side. Place the caliper upside down on the workbench with the inlet port facing away from you.Insert the air tool into the fluid inlet port of the caliper.Turn the caliper over with the cylinder bore facing towards you.Use a pointed tool to remove the piston seal from the caliper.You have now completed the final step in disassembling a rear brake caliper. Remember to inspect and clean all parts before reassembly.
Rear brake caliper placed in the correct position for Step 1: Remove bracket from brake caliper.
Bracket placed in correct position for Step 2: Inspect and clean retaining bolts.
Brake caliper placed in correct position for Step 3: Remove piston from brake caliper.
Caliper placed in correct position for Step 4: Remove piston seal from brake caliper.
Channel viewed in Junaio AR browser (Portrait).Channel viewed in Junaio AR browser (Landscape).Channel viewed in Junaio AR browser (Portrait).Channel viewed in Junaio AR browser (Landscape).
“What we plan for the use of something is not necessarily how people will use it and we don’t necessarily dictate how they use it. We open it up and we hope for the best and a lot of the times we are surprised.”
I would never, ever, EVER claim to be anywhere near the absolute awesomeness of Jim or Alan, but from my own wonky experience I believe what they say to be true.
Placing geometry in the 3D point cloud in Metaio Creator 2.6 is a little cumbersome, bewildering and often inaccurate. It takes lots of clicking and seemingly random fiddling to place geometry. You also can’t really determine if your geometry is placed correctly within the 3D point cloud until you upload to your channel and then view your channel in Junaio on your device. If it’s not placed correctly, you need to tweak it in Creator, publish it and then view it again in Junaio. Repeat process until it looks like it might almost be placed correctly. Curious.
The first step in disassembling a rear brake caliper is to remove the bracket from the caliper. Use a spanner to loosen the retaining bolts.The second step in disassembling a rear brake caliper is to inspect and clean the retaining bolts and remove the rubber seal from the bracket.The third step in disassembling a rear brake caliper is to remove the piston from the caliper.The fourth and final step in disassembling a rear brake caliper is to remove the piston seal from the caliper.
Screen captures from my image tracking tests in Junaio for each step of the disassembly process with UI elements. Unfortunately, due to my Z translation problems in UI Designer of Creator 2.6 I had to remove the background image which was placed underneath the buttons. Doing this gives the buttons a floaty and slightly random feel, but at least the buttons function as they should!
The first step in disassembling a rear brake caliper is to remove the bracket from the caliper. Use a spanner to loosen the retaining bolts.The second step in disassembling a rear brake caliper is to inspect and clean the retaining bolts and remove the rubber seal from the bracket.The third step in disassembling a rear brake caliper is to remove the piston from the caliper.The fourth and final step in disassembling a rear brake caliper is to remove the piston seal from the caliper.
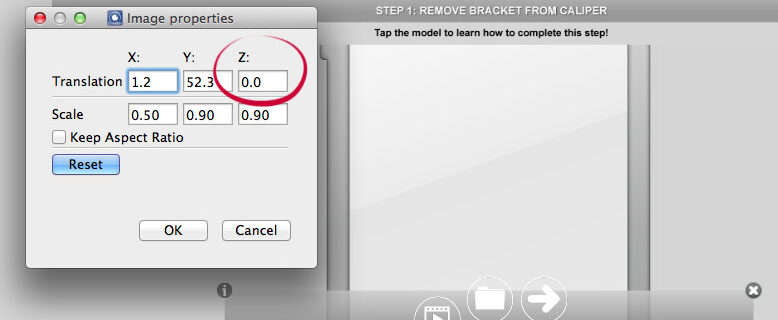
I’m currently wrestling with the correct Z translation of images and buttons in UI Designer of Creator 2.6. I’ve placed some buttons on top of an background image in the UI Designer of Creator and have encountered a problem where the image obscures the buttons and prevents them from working. I’ve checked the Z translation of the image in relation to the buttons and have made sure the buttons translated above the background image, but this doesn’t seem to make a difference when the published channel is viewed in Junaio on my iPad.
While attempting to solve this problem on my own in Creator, I experimented with placing the buttons partially over the background image and then publishing to my channel. This had an interesting result. The button displays and functions correctly!
Here are some screen captures of the properties windows for the background image and each button in the UI Designer of Creator and the published channel viewed in Junaio on my iPad.
The properties window for the background image. The image has a 0.0 Z translation.The properties window for the button placed over the background image. The button has a 5.0 Z translation.The properties window for a button placed partially over the background image. The button has a 5.0 Z translation.The palcement of UI elements in the published channel viewed in Junaio on my ipad.
My exploration of how we learn and how we design and develop digital stuff that helps us learn.